[ Python ] 간단한 MNIST 모델 (OCR) 만들기
전체 Source는 Github에 있습니다.
1. Keras로 MNIST 모델생성
from keras.datasets import mnist
from keras.models import Sequential
from keras.layers.core import Dense, Dropout, Activation
from keras.optimizers import Adam
from keras.utils import np_utils

# MNIST 데이터 읽어 들이기 --- (※1)
(X_train, y_train), (X_test, y_test) = mnist.load_data()

# 데이터를 float32 자료형으로 변환하고 정규화하기 --- (※2)
X_train = X_train.reshape(60000, 784).astype('float32')
X_test  = X_test.reshape(10000, 784).astype('float')
X_train /= 255
X_test  /= 255

# 레이블 데이터를 0-9까지의 카테고리를 나타내는 배열로 변환하기 --- (※2a)
y_train = np_utils.to_categorical(y_train, 10)
y_test  = np_utils.to_categorical(y_test, 10)

# 모델 구조 정의하기 --- (※3)
model = Sequential()
model.add(Dense(512, input_shape=(784,)))
model.add(Activation('relu'))
model.add(Dropout(0.2))
model.add(Dense(512))
model.add(Activation('relu'))
model.add(Dropout(0.2))
model.add(Dense(10))
model.add(Activation('softmax'))

# 모델 구축하기 --- (※4)
model.compile(loss='categorical_crossentropy',
              optimizer=Adam(),
              metrics=['accuracy'])

# 데이터 훈련하기 --- (※5)
hist = model.fit(X_train, y_train, epochs = 100)

# 테스트 데이터로 평가하기 --- (※6)
score = model.evaluate(X_test, y_test, verbose=1)
print('loss=', score[0])
print('accuracy=', score[1])

# 모델 저장하기 --- (※6)
model.save('keras_mnist.h5')  # creates a HDF5 file 'my_model.h5'
print("keras_mnist Image Classification Model Save OK")
2. 필기인식 Data Load
손글씨 숫자 데이터로 MNIST 에서 공개하고 있는 데이를 사용. 이미지 데이터는 각 픽셀을 Grayscale 256단계로 나타내며, 왼쪽 위부터 오른쪽 아래로 차례차례 픽셀이 나열된 형태. 0은 기본 배경색(흰색)이고, 1 ~ 255가 실제 손글씨가 적힌 부분을 나타냄 (28 X 28 픽셀)
import numpy as np
import os
import urllib.request
import gzip
import struct
import base64

def download_data(url, force_download=True):
    fname = url.split("/")[-1]
    if force_download or not os.path.exists(fname):
        urllib.request.urlretrieve(url, fname)
    return fname

def read_data(label_url, image_url):
    with gzip.open(download_data(label_url)) as flbl:
        magic, num = struct.unpack(">II", flbl.read(8))
        label = np.frombuffer(flbl.read(), dtype=np.int8)
    with gzip.open(download_data(image_url), 'rb') as fimg:
        magic, num, rows, cols = struct.unpack(">IIII", fimg.read(16))
        image = np.frombuffer(fimg.read(), dtype=np.uint8).reshape(len(label), rows, cols)
    return (label, image)

path='http://yann.lecun.com/exdb/mnist/'

(train_lbl, train_img) = read_data(path+'train-labels-idx1-ubyte.gz', path+'train-images-idx3-ubyte.gz')
(val_lbl, val_img) = read_data(path+'t10k-labels-idx1-ubyte.gz', path+'t10k-images-idx3-ubyte.gz')
처음 10 개의 이미지를 레이블(Lable)과 함께 출력함
%matplotlib inline
import matplotlib.pyplot as plt

for i in range(10):
    plt.subplot(1,10,i+1)
    plt.imshow(train_img[i], cmap='Greys_r')
    plt.axis('off')
plt.show()
print('Label: %s' % (train_lbl[0:10],))
3. 모델 불러오기
import numpy as np
from keras.models import load_model

model = load_model('keras_mnist.h5')
모델 테스트
img = val_img[0]

plt.imshow(img, cmap='Greys_r')
plt.axis('off')
plt.show()
re_val_img = img.reshape(1, 784).astype('float32')

prob = model.predict(re_val_img/255)[0]
#prob = model.predict(val_img[0:1].astype(np.float32)/255)[0]

assert max(prob) > 0.99, "Low prediction accuracy."
print ('Classified as %d with probability %f' % (prob.argmax(), max(prob)))
4. Input Form 그리기
input_form = """
<style type="text/css">
  canvas { border: 1px solid black; }
</style>

<div id="board">

  <canvas id="myCanvas" width="200px" height="200px">
    Sorry, your browser doesn't support canvas technology.
  </canvas>

  <p>
    <button id="classify" onclick="classify()">
      Classify
    </button>

    <button id="clear" onclick="myClear()">
      Clear
    </button>
    Result:
    <input type="text" id="result_output" size="5" value="">
  </p>

</div>
"""
5. Script 작성
javascript = """
<script type = "text/JavaScript" src = "https://ajax.googleapis.com/ajax/libs/jquery/1.4.2/jquery.min.js?ver=1.4.2" > </script>

<script type = "text/javascript" >
    function init() {
        var myCanvas = document.getElementById("myCanvas");
        var curColor = $('#selectColor option:selected').val();
        if (myCanvas) {
            var isDown = false;
            var ctx = myCanvas.getContext("2d");
            var canvasX, canvasY;
            ctx.lineWidth = 8;
            $(myCanvas).mousedown(function(e) {
                isDown = true;
                ctx.beginPath();
                var parentOffset = $(this).parent().offset();
                canvasX = e.pageX - parentOffset.left;
                canvasY = e.pageY - parentOffset.top;
                ctx.moveTo(canvasX, canvasY);
            }).mousemove(function(e) {
                if (isDown != false) {
                    var parentOffset = $(this).parent().offset();
                    canvasX = e.pageX - parentOffset.left;
                    canvasY = e.pageY - parentOffset.top;
                    ctx.lineTo(canvasX, canvasY);
                    ctx.strokeStyle = curColor;
                    ctx.stroke();
                }
            }).mouseup(function(e) {
                isDown = false;
                ctx.closePath();
            });
        }
        $('#selectColor').change(function() {
            curColor = $('#selectColor option:selected').val();
        });
    }

init();

function handle_output(out) {
    console.log(out);
    var res = null;
    // if output is a print statement
    if(out.msg_type == "stream"){
       res = out.content.data;
    }
    // if output is a python object
    else if(out.msg_type === "execute_result"){
       res = out.content.data["text/plain"];
    }
    // if output is a python error
    else if(out.msg_type == "pyerr"){
       res = out.content.ename + ": " + out.content.evalue;
    }
    // if output is something we haven't thought of
    else{
       res = out.msg_type;
    }
    document.getElementById("result_output").value = res;
}

function classify() {
    var kernel = IPython.notebook.kernel;
    var myCanvas = document.getElementById("myCanvas");
    data = myCanvas.toDataURL('image/png');
    document.getElementById("result_output").value = "";
    kernel.execute("classifyML('" + data + "')", {
        'iopub': {
            'output': handle_output
        }
    }, {
        silent: false
    });
}

function myClear() {
    var myCanvas = document.getElementById("myCanvas");
    myCanvas.getContext("2d").clearRect(0, 0, myCanvas.width, myCanvas.height);
}
</script>
"""
6. 테스트
from IPython.display import HTML
import cv2
import numpy as np

def classifyML(img):
    img = base64.b64decode(img[len('data:image/png;base64,'):])
    img = cv2.imdecode(np.fromstring(img, np.uint8), -1)
    img = cv2.resize(img[:,:,3], (28,28))
    img = img.astype(np.float32).reshape((1,784))/255.0
    print(model.predict(img)[0].argmax())
    return model.predict(img)[0].argmax()

HTML(input_form + javascript)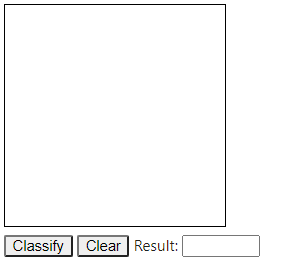
Jupyter Notebook에서 실행하여 테스트 할 수 있습니다.
반응형
'Tech & Development > OCR' 카테고리의 다른 글
| [ OCR ] 문자 추출 및 인식 (EAST text Detector Model) - Python (5) | 2022.01.13 |
|---|---|
| [ OCR ] 파이썬 Tesseract OCR 활용 (심화2) - Python (7) | 2022.01.11 |
| [ OCR ] 파이썬 Tesseract OCR 활용 (심화1) - Python (5) | 2022.01.11 |
| [ OCR ] 파이썬 Tesseract OCR 활용 (기본) - Python (4) | 2021.12.23 |
| [ OCR ] Tesseract, PyTesseract 설치방법 (OCR 개발환경) - Python (1) | 2021.12.13 |