dlib, Python을 이용하여 얼굴 인식하는 방법
간혹 TV나 영화를 보다보면 누가 누군인지 모를 정도로 닮아 혼란에 빠뜨리게 하는 연애인이 있습니다.

다른 연애인 도플갱어 블로그나 얼굴 인식 기술을 소개하는 자료를 보면 항상 등장하는 사람이 있는데, 바로 Will Ferrell(배우)과 Chad Smith(뮤지션) 입니다.

실제로 두 사람은 닮은 꼴로 유명해서 The Tonight Show라는 토크쇼에 출연했었습니다.

이전 글에서 얼굴을 검출하는 방법을 소개했었는데, 이번에는 얼굴 고유한 특징을 찾아 구별해내는 얼굴 인식 기술을 구현하는 방법을 소개하도록 하겠습니다.
실제로 얼굴을 구별하는 단계에 이르렀습니다. 하지만 이미 얼굴 태그가 달린 사람들과 비교를 하기에는 너무 오래 걸립니다. 특히 수십억 멱의 사용자와 1조 개의 사진이 있는 Facebook같은 사이트라면 상황이 더 심각해집니다. 그래서 얼굴에서 몇 가지 측정값을 추출하여 측정값과 가장 가까운 값을 가지는 얼굴을 찾도록 하였습니다. 예를 들어, 각 귀의 크기, 눈 사의 간격, 코의 길이 등을 측정해서 비교하는 것입니다.
하지만 실제로 각 귀의 크기, 눈 사의 간격, 코의 길이와 같이 측정 값을 사람이 지정하지 않습니다. 컴퓨터가 수집할 측정 값을 스스로 파악하도록 하기위해 Deep Convolutional Neural Network 으로 학습을 시켰고 각 얼굴에 대해 128개의 측정 값이 생성되도록 훈련이 되었습니다.
훈련 과정은 3 개의 얼굴 이미지를 차례 대로 확인하는 것입니다.
1. 훈령용 아는 사람의 얼굴 사진 적재(load)
2. 동일한 아는 사람의 다른 사진 적재
3. 전혀 다른 사람의 사진 적재
그리고 알고리즘은 세 개의 이미지 각각에 대해 현재 생성하고 있는 측정값을 확인합니다. 그런 다음에, #1 과 #2 이미지에 대해 생성한 측정값은 서로 좀더 가깝게 하고 #2와 #3의 측정값은 좀더 멀어지도록 신경망을 조금 조정합니다.

수천 명의 다른 사람들의 수백만 개의 이미지에 대해 이 단계를 수백만 번 반복 하면, 신경망은 각 사람에 대한 128개의 측정 값을 신뢰성 있게 생성하는 방법을 배우게 됩니다.
기계 학습을 하는 사람들은 각 얼굴에 대한 128개의 측정 값을 임베딩(embedding)이라고 부릅니다. 사전 훈련된 신경망을 사용해서 우리츼 얼굴 이미지로부터 128개의 측정 값을 얻을 수 있습니다.

[ 참고 ] Machine Learning is Fun! Part 4: Modern Face Recognition with Deep Learning
전체 Source는 Github에 있습니다.
우선, dlib이 이미 설치가 되어 있어야 합니다. 만약 설치되어 있지 않다면 dlib 설치가이드를 참고하시여 설치를 진행하시기 바랍니다.
1. Install
pip install face_recognition2. Import Packages
from imutils
import face_utils
import matplotlib.pyplot as plt
import numpy as np
import argparse
import imutils
import dlib
import cv2
import face_recognition

known_face_encodings = []
known_face_names = []
3. Function
Colab 또는 Jupyter Notebook에서 이미지를 확인하기 위한 Function입니다.
def plt_imshow(title='image', img=None, figsize=(8 ,5)):
    plt.figure(figsize=figsize)

    if type(img) == list:
        if type(title) == list:
            titles = title
        else:
            titles = []

            for i in range(len(img)):
                titles.append(title)

        for i in range(len(img)):
            if len(img[i].shape) <= 2:
                rgbImg = cv2.cvtColor(img[i], cv2.COLOR_GRAY2RGB)
            else:
                rgbImg = cv2.cvtColor(img[i], cv2.COLOR_BGR2RGB)

            plt.subplot(1, len(img), i + 1), plt.imshow(rgbImg)
            plt.title(titles[i])
            plt.xticks([]), plt.yticks([])

        plt.show()
    else:
        if len(img.shape) < 3:
            rgbImg = cv2.cvtColor(img, cv2.COLOR_GRAY2RGB)
        else:
            rgbImg = cv2.cvtColor(img, cv2.COLOR_BGR2RGB)

        plt.imshow(rgbImg)
        plt.title(title)
        plt.xticks([]), plt.yticks([])
        plt.show()
얼굴을 찾아 인코딩 후 비교하고 출력하는 Function 입니다. Fucntion에 대해 간략히 설명드리자면 이미지에서 얼굴을 찾고 찾은 영역의 얼굴을 인코딩합니다. 이렇게 찾은 얼굴의 인코딩 값을 반복적으로 수행하면서 찾으려고 등록했던 known_face_encodings 리스트와 비교합니다.
def name_labeling(input_image):
    image = input_image.copy()
    face_locations = face_recognition.face_locations(image)
    face_encodings = face_recognition.face_encodings(image, face_locations)

    face_names = []

    for face_encoding in face_encodings:
        matches = face_recognition.compare_faces(known_face_encodings, face_encoding, tolerance=0.5)
        name = "Unknown"

        face_distances = face_recognition.face_distance(known_face_encodings, face_encoding)
        best_match_index = np.argmin(face_distances)

        if matches[best_match_index]:
            name = known_face_names[best_match_index]

        face_names.append(name)

    for (top, right, bottom, left), name in zip(face_locations, face_names):
        if name != "Unknown":
            color = (0, 255, 0)
        else:
            color = (0, 0, 255)

        cv2.rectangle(image, (left, top), (right, bottom), color, 1)
        cv2.rectangle(image, (left, bottom - 10), (right, bottom), color, cv2.FILLED)
        font = cv2.FONT_HERSHEY_DUPLEX
        cv2.putText(image, name, (left + 3, bottom - 3), font, 0.2, (0, 0, 0), 1)

    plt_imshow("Output", image, figsize=(24, 15))
찾을 얼굴을 등록하는 Function입니다.
def draw_label(input_image, coordinates, label):
image = input_image.copy()
(top, right, bottom, left) = coordinates
cv2.rectangle(image, (left, top), (right, bottom), (0, 255, 0), 5)
cv2.putText(image, label, (left - 10, top - 10), cv2.FONT_HERSHEY_SIMPLEX, 2, (0, 255, 0), 3)
return image
def add_known_face(face_image_path, name):
face_image = cv2.imread(face_image_path)
face_location = face_recognition.face_locations(face_image)[0]
face_encoding = face_recognition.face_encodings(face_image)[0]
detected_face_image = draw_label(face_image, face_location, name)
known_face_encodings.append(face_encoding)
known_face_names.append(name)
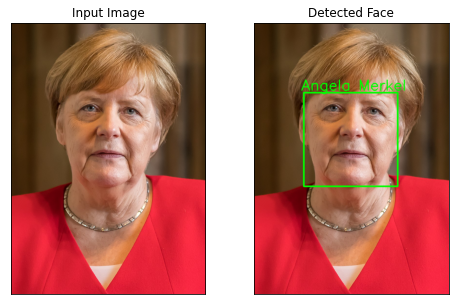
plt_imshow(["Input Image", "Detected Face"], [face_image, detected_face_image])4. Add face
이미지 경로와 이름을 입력하면 얼굴 인코딩 값을 리스트에 추가합니다.
add_known_face("asset/images/Boris_Johnson.jpeg", "Boris Johnson")
add_known_face("asset/images/Angela_Merkel.jpeg", "Angela Merkel")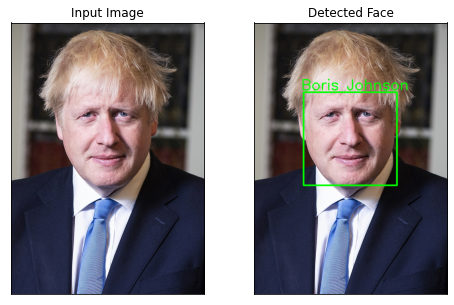
5. Face Recognition
known_face_encodings = []
known_face_names = []

test_image_path = 'asset/images/2021_g7.jpg'
test_image = cv2.imread(test_image_path)

if test_image is None:
    print('The image does not exist in the path.')
else:
    print('image loading complete.')
name_labeling(test_image)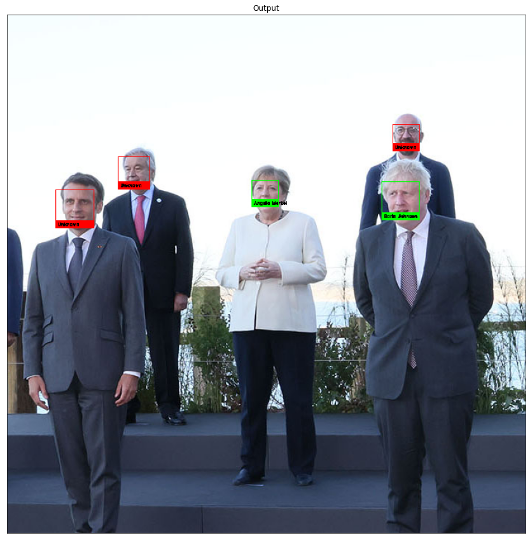
정확하게 잘 찾았네요.
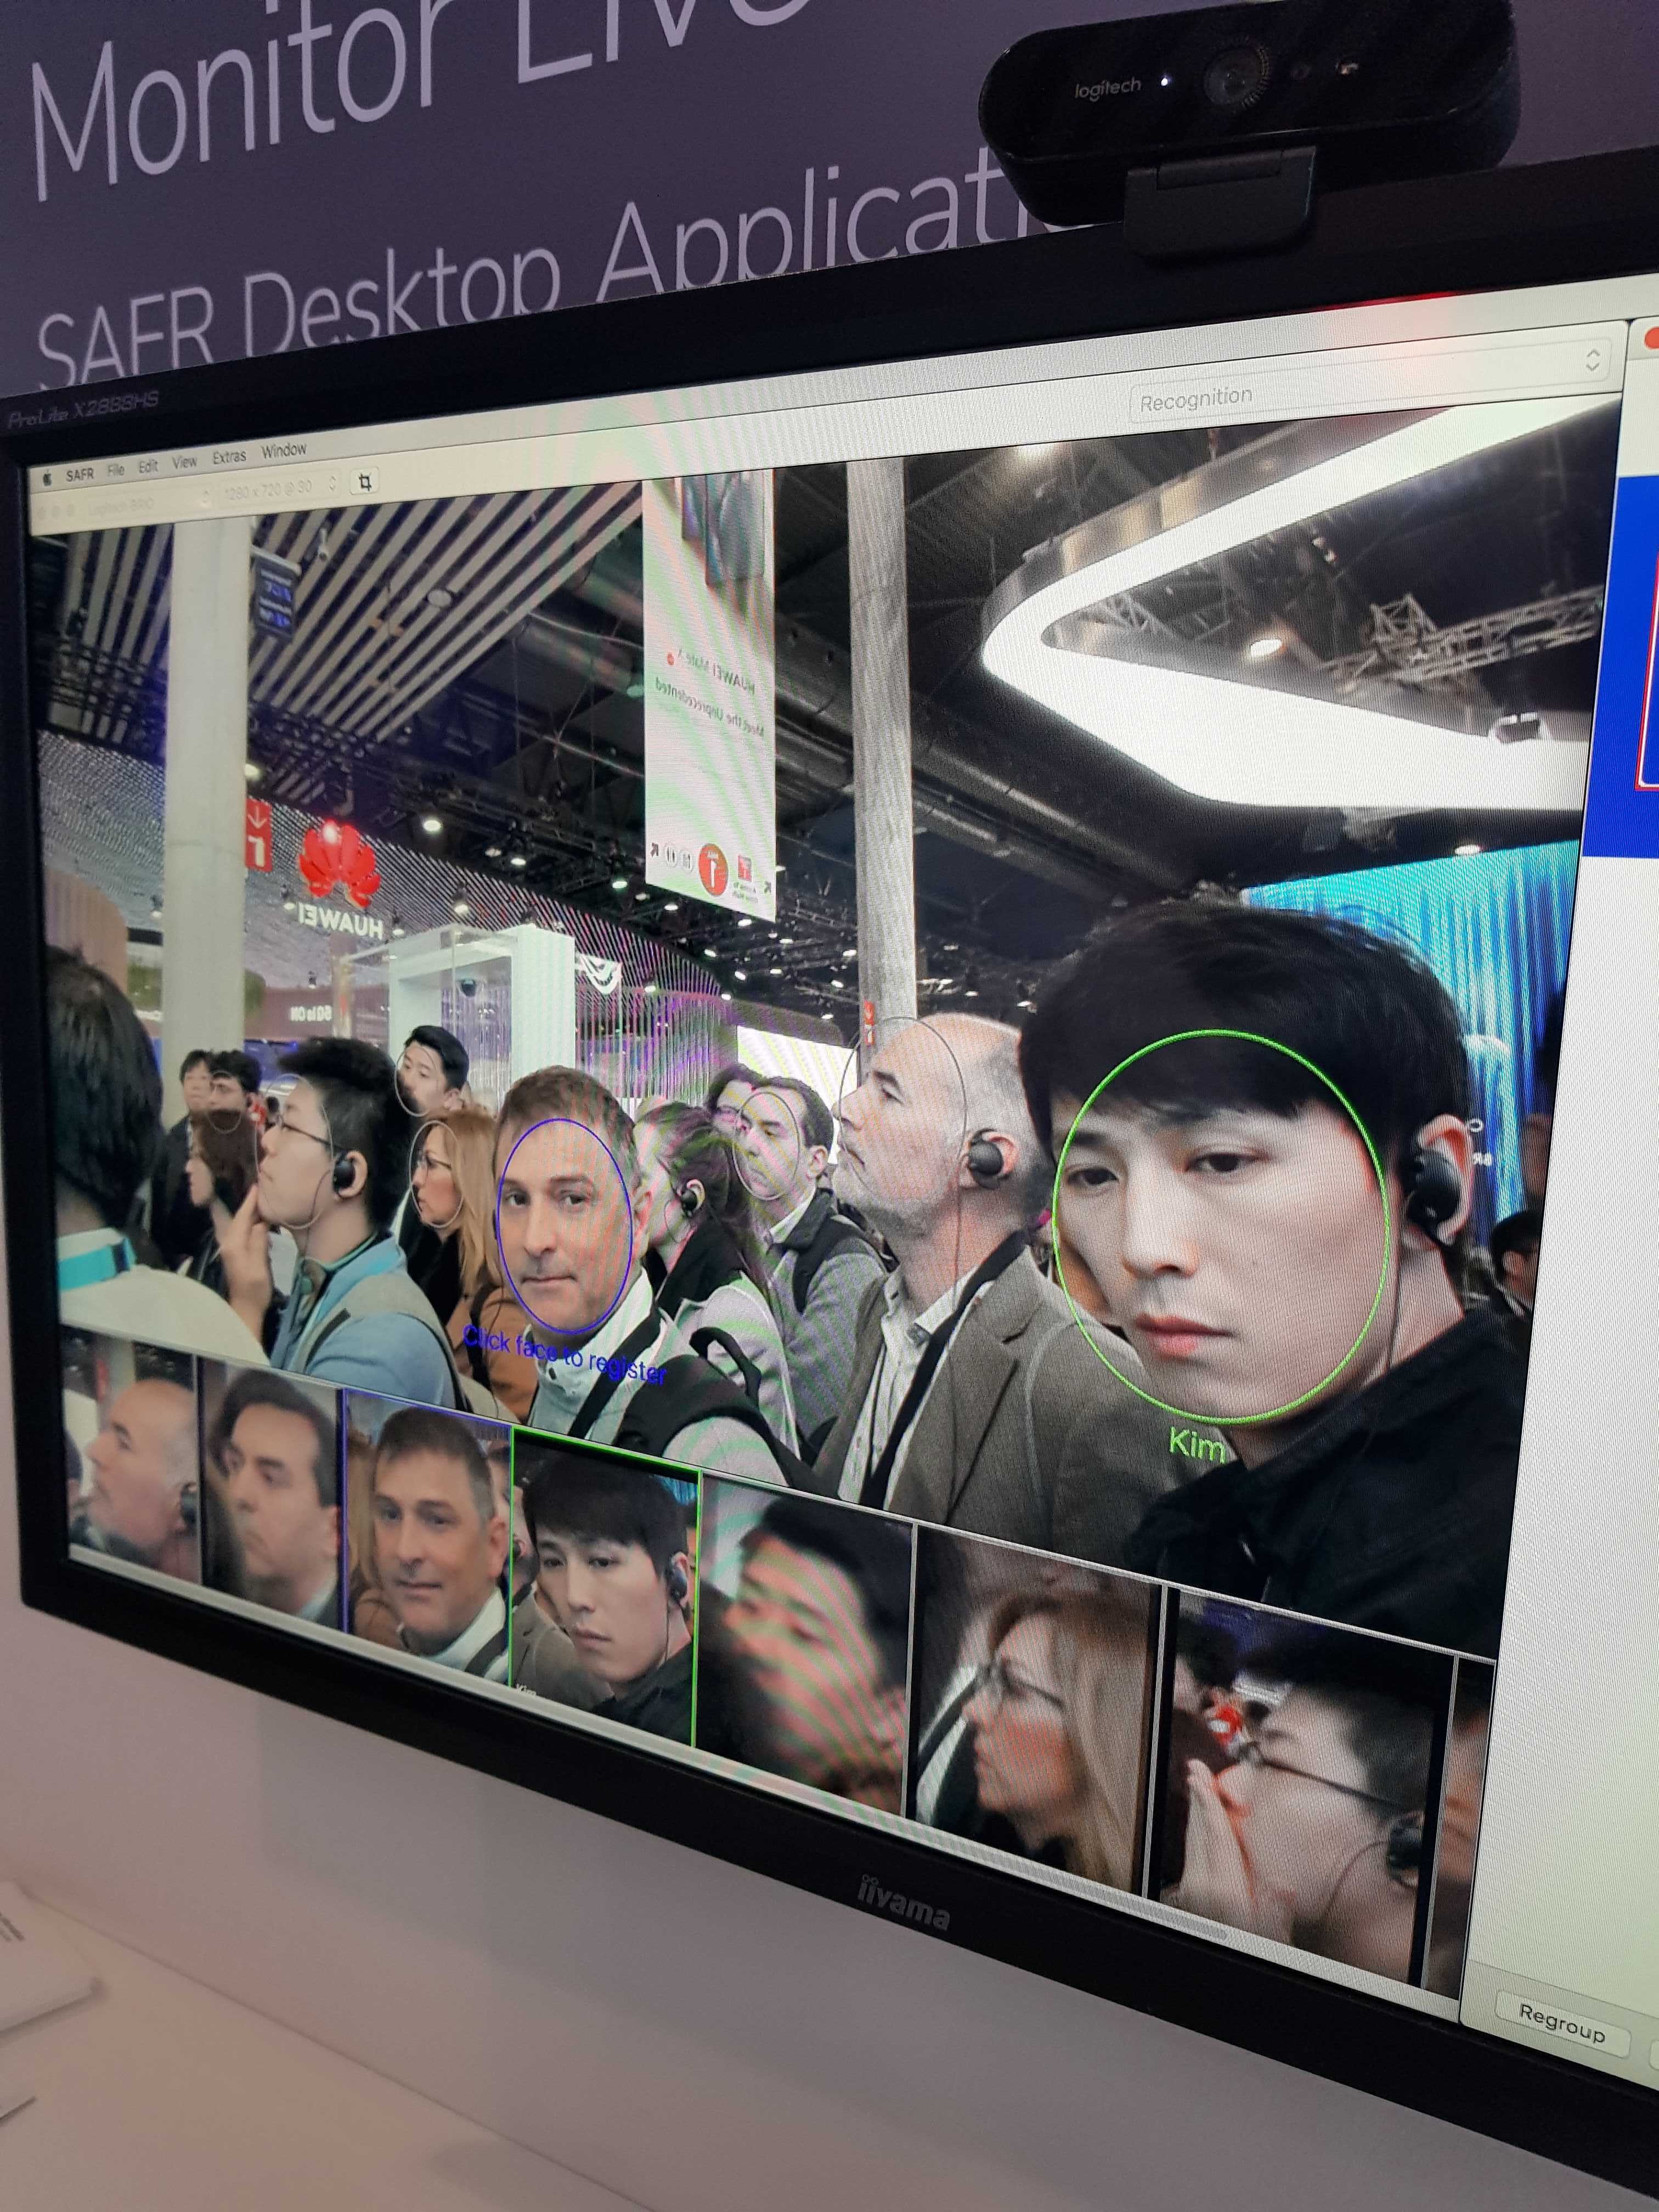
2019년 MWC에서도 얼굴 인식과 관련 된 주제를 소개하는 부스가 참 많았습니다.
당시 재미났던 경험은 얼굴을 인식하여 문을 열어주는 솔루션을 가지고 나온 일본 업체가 있었습니다. 인식까지는 잘됐습니다. 그런데 혹시 촬영된 사진으로도 열리는지 물어봤더니 절대 안된다 했는데...열렸..습니다..ㅎ
일본 업체는 황당했지만 이미 많은 얼굴 인식 솔루션에는 face spoofing을 방지하는 방법과 알고리즘은 많이 연구되었고 적용하고 있습니다.
'Tech & Development > AI' 카테고리의 다른 글
| Python, OpenCV Haar Cascades를 이용한 얼굴 인식방법 (0) | 2022.01.28 |
|---|---|
| dlib, Python을 이용하여 강아지 얼굴 인식하는 방법 (3) | 2022.01.24 |
| dlib, Python을 이용하여 얼굴 검출하기 (0) | 2022.01.20 |
| 맥북 dlib 간단하게 설치하기 (Mac OS) (0) | 2022.01.17 |
| 딥러닝 객체 검출 용어 정리 (0) | 2021.08.25 |